Sunday, May 13, 2018

this


Apologies to sailingbits.comCSTexpress.comKA Sail - this old MSL13 sail looks shocking after one or two small tweaks! This is the last iteration of my rig - from March 2016. Shortened mast, raised clew, some amount trimmed off the head and added back below the boom to maintain the luff length. It was going pretty well upwind in 20kts but under-powered downwind in the light stuff. I think it's a really promising avenue for development, the boat felt friction-less in the air, though the deck around the mast needs cleaning up to improve the seal between the hull and sail. Possibly if a real sailmaker came on board, the results may improve, just saying. Also some larger sailcloth scraps would help!

Unfortunately the boat has been packed up for over a year now as I have been away in the US. Hopefully I can get back into this soon!


Wednesday, August 7, 2013

Sailing with the new tramps


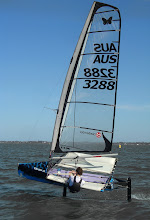
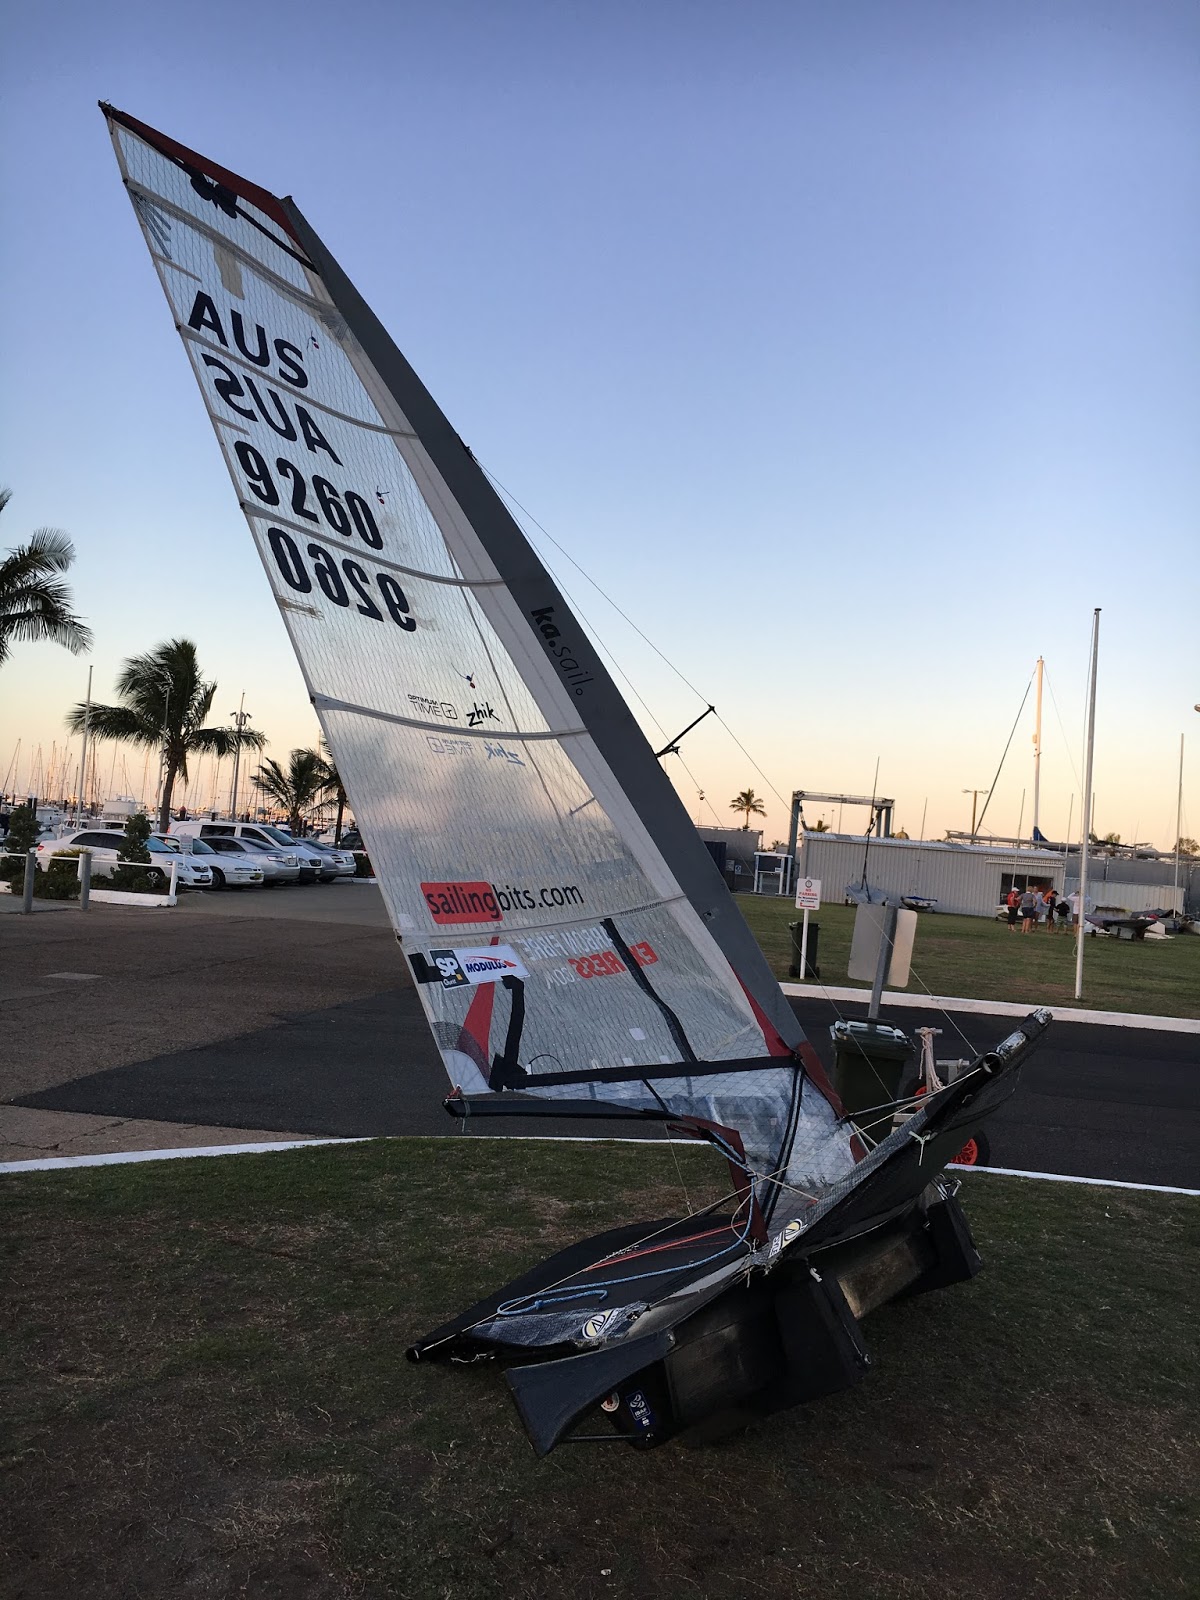
The deserted rigging lawn at DPSS, a glamour winter's day in Queensland. The boat has been on the water half a dozen times now, and looking fairly promising, though lining up against other moths has proved tricky.

A large part of this project has been designing and building the aerodynamic tramps for the boat. They are shaped quite carefully to maintain attached airflow around the lower surface when sailing upwind. The tramps are supposed to generate lift downward and to leeward, with a slight forward component, reducing drag and possibly even contributing to the driving force. Despite being complicated, heavy and generally troublesome, I like them. A few people have suggested that, as an alternative, i could have built the wings as rigid carbon structures, and I think there is merit in that idea. I went down this path because:
  • I wanted the option to disassemble and pack up the wings for transport
  • I didn't want to have to make all that tooling
  • I was happy in this instance to base the design on a tried and true structure
At this point I should thank Yancy Smith at Doyle Sails Queensland for teaching me everything I now know about sailmaking, letting me stay at his house, use his sewing machine / loft etc. I spent some time trying to 'work off' my debt doing sail repairs, so if yours was the luff tape I sewed on or the batten pocket I fixed etc, I apologise in advance for the sketchy workmanship. Totally out of character for an otherwise high performing loft.

With access to the sail plotter, I had the chance to experiment with ways of unwrapping / flattening the panels from the rhino model. Once in 2d, You can throw in the seam allowances and number the panels ready for plotting and cutting. I think it was the first time Yancy had done that with the plotter, and hopefully in the future it will streamline the process of making boat covers, bags, logos etc. Once everything was cut out, it was just a simple process of sticking it all up and sewing it together! A week later, I had the first set of tramps that everyone has seen already.

We initially went for a Technora laminate for both the top and bottom skins, with a luff pocket made of black luff sleeve material. As it became clear that fitting the bottom skin was going to be a challenge, I sewed it all together with just the top skin and went sailing. The Technora looked great, but had a couple of major flaws- it was slippery - soon overcome by adding taffeta film, and it was too stiff meaning that the few wrinkles from the luff pocket couldn't be pulled out. In the end though, it was the point loading near the seams that brought it undone, and it started falling apart after a couple of sails and one return trip on the highway.

I went back up to Yancy's and unpicked it all, replacing the top panel with some heavy black Dacron. We worked out how to tension the bottom skin to the bolt rope track, and it all went back together. The Dacron on top looked much tighter, (but obviously wasn't due to the extra stretch, the Technora had a great rigid feel despite being a bit wrinkly) and the sail shape in the bottom is 80% there.

Here's a bit of a montage of the tramps going together:


I've been sailing twice now with the full wing tramps, and it generally feels nice and clean. Definitely reduced air noise around the boat, though reaching and running you'd struggle to see a speed difference, possibly due to the extra couple of kilos in the tramps alone. Upwind though I think I have managed to get the flow to hook up a couple of times, and she feels like a rocket. I haven't really lined up against anyone who's super fast yet though, (no offence Rob!) so probably too early to make a call.

Practically, our efforts to get water to drain, tension to remain and things to be generally durable seem to be paying off, with the lower skin being hardly noticeable when sailing. I can't feel any real difference when righting from a capsize etc, though haven't been out in anything more than 10 knots and flat water. It's a fun experiment.

Here's a short video, marginal conditions, footage captured by Rob Green from the rescue boat. Check out my sail looking shitty! Next big item on the agenda is the rig, and between Yancy and I, we have a few ideas.

Sunday, April 14, 2013

launched

This morning, we woke up to an unusual sight in Brisbane - sunshine! Saturday's torrential rain had subsided and Nick, Mark and I decided this was our chance to get on the water. For me, it was the first outing in the new boat. A quiet day - 5 knots from the east and flat, perfect conditions for loading the boat up a bit and testing the systems. There are still a few things to finish - the tramps are missing their bottom skins and need some minor tweaking, there is no non-skid, no gearing adjustment and the finish on the foils needs a bit of work. All non-critical things though, and the boat sailed well. No breakages, no glaring errors or omissions at this early stage. Great to be back on the water!


Edit: It appears I've skipped out a couple of steps in the build blog! there's a bit of non-chronological shit going on. il get back onto it soon.

Monday, March 11, 2013

Finishing the hull - Part 6

Just a quick post to show how the hull went together, and note a couple of tricks I picked up in the process. On the whole, the parts from the CNC tools fitted together really well. I thought at one stage there was some sort of error with the front wingbar socket location, but it turned out to be human error. I wasn't careful enough in aligning the two sections of the mould when I joined them. Lesson: don't leve any small detail at all up to the human! The sides and foredeck were designed to just glue to the hull, (they only fitted in one spot so it was impossible to get that wrong) but the deck needed to be glued in and then the joints reinforced with carbon tapes.

After Half-meanie's disastrous tapes, I decided to try spray gluing the dry carbon to the joints and wetting out with resin afterward. I used a product called Infuzene, which is designed for temporarily holding the laminate together in an infusion process. It worked pretty well, but ended up coming un-stuck in some places where the resin wet it out. Some people suggested just 3M spray glue, which I might try at some point. The final bond of the tape to the hull seemed ok in the end - Infuzene is designed to be a bit lumpy so as not to coat the entire surface of the cloth - time will tell if i've completely stuffed it up.

I took the boat outside for a tidy up, and wet'n'dried the whole thing ready for clear coat. The surface isn't going to be perfect - the odd pin hole, dent, seam etc. but I just couldn't be bothered fairing it at this point! it looks fine generally by my standards. The foils will be a different story of course.


Dad helping out after we joined the second fairing to the hull

Dry tapes stuck down with spray glue

Infuzene spray - the pink blotchy stuff


Monday, February 18, 2013

Wingbar corners & foil strut - Part 5

Two of the more complicated components were always going to be the bladder moulded wingbar corners and the centreboard strut. I put off starting them for as long as I could, but at some point I needed them to progress so I had a coffee and started working out what to do.

I did a bit of research on the web on bladder moulds, and found this guy to be quite helpful. Im sure there are other similar vids but by the time you've watched those, you'll probably have gained all you can and then you have to do an experiment. I had two tests with cheaper materials before biting the bullet and laying up the first part. The first test was pretty hopeless, but by the third attempt I had it down.

 The moulds I had finished and prepped earlier, and worked pretty well but in hindsight they could have been stronger to take the fairly serious pressure that they get put under. On one, the MDF split at the join where the two thicknesses of wood had been laminated together, and created a bit of a bump in the finished part. MDF is ok, but probably use a single thickness or glue the sheets together with something better than PVA!

I made bladders as shown in the video, with a soldering iron ground flat at the tip. I went through half a dozen before I got one that would go the distance. I used black builder's plastic, but something more elastic would have given a bit of margin for error - it was too thick and would split before it would stretch. Making it quite oversize seemed to help, with the final size being almost twice the circumference and 100mm longer than the mould. I used a barbed Nitto fitting that plugged straight into the compresser and sealed it to the bladder with a big rubber band as in the vid. A bit of plumbers tape helped, tacky tape was surprisingly useless under positive pressure.

I laid up the tubes so that the carbon in one half was about flush with the seam, and the other half had a 10mm overlap on both sides. That seemed to make it easier to get the bladder in - deflated with the vacuum pump - and then get the carbon to seat cleanly onto the other half when closing the mould. Once closed, I found it could take 40psi without too much drama, and I just left it like that until it cured. Sometimes there would be a slow leak, and the compresser would just cycle as required. That's not ideal, and it's worth getting a good seal.

It's surprising how much more compact the laminate is when cured at 40psi (2.75 atmospheres) compared to under vacuum. The corners came out at about 460g each, but considering how much carbon was in them, that translated to a resin ratio of about 30 - 35% which was on the money I reckon. They are about as bullet proof as I could hope to build. It's a great process.

The two test runs and the finished product

Making the plastic bladder with the soldering iron, baking paper and template

The two halves pre-bladder

The bladder deflated and held in a bundle with blu-tac. With such a thick laminate it was quite difficult to get it to all sit down long enough to close the mould.

The mould closed and under pressure, with resin oozing out of it

The centreboard was fairly straightforward by comparison, the only difficulties being the meaty layup and the carbon pultrusion that needed to go down the middle. I used standard modulus carbon even though there was some IM available from CG, only because I already had it lying around. I reasoned that the foil section is quite thick at the hull intersection, and that it should be inherently quite stiff, but at the end of the day you can't go wrong with higher modulus material. Next time.

When laying up, I added some extra laminates to build up a flat section for the pultrusion to seat onto. That was all bagged down and in a second step I closed the mould with glue and foaming epoxy inside and let the excess foam spew out a couple of holes. The idea was that as the foam expanded, it pressed the glue into the joints. It seems to have worked, though it's a bit heavier than it could have been - at 250kg/m3 fully expanded, the foaming epoxy isn't as light as a milled foam core, but it is convenient. The whole thing went into the oven for a ~12 hour post cure.


Making the cutting template from aluminium foil

Cutting out the carbon 


Under Vacuum


Monday, February 11, 2013

CAD to real life - Part 4

The build is progressing well, an I apologise for getting behind on the blog, but I thought it might be neat to sum up some of the tricks I've been playing with in an attempt to keep the project on schedule. With a detailed Rhino model as a reference, it's been amazingly efficient to print or CNC cut templates for all sorts of jobs at 1:1, eliminating the need for double-handling of measurements and reducing the potential for certainty of operator error. If only you could make buildings this way, it would save all that time making 2d drawings from the 3d model, only to have them poorly re-interpreted back into a 3d building! Here we go from 3D model to 3D boat.

For a start, it has been fortunate that the Alpha hull is incredibly close to the original digital shape. John Gilmour did a nice job with the mould, and I guess would have used CNC to cut out the stations from his initial model. I'm benefiting from his hard work now, with the female moulded deck, foredeck and wing fairings mating onto it with only minor swearing and banging.

All the internal bulkheads were hand cut from carbon flat panel, guided by templates that I created in rhino using the 'section' command. I made an allowance in the drawing for the thickness of the shell, and just followed the line with the jigsaw. They all fitted perfectly first go after an  hour's work, a big time saver compared to the last boat.

To align the wingbars, a traditionally painful job, I cut a couple of templates from some scrap MDF on the CNC. They eliminated all the guess work in setting up the wings, it was almost too easy. You can see how perfectly the template mated to the CNC cut deck. In the end though when I eyeballed the wings, I decided that they needed to be a bit steeper, so I propped up the templates off the deck a bit to get that to work.  I guess it's always a bit of a surprise when you see the real thing having 'understood' it on the screen, and you have to trust that you can make judgements in real life too. I had to then adjust the CAD model to reflect those changes so that the tramps would still fit!

Another job that was painful last time was doing all the tube copings. There are coping calculators around that would have helped me before with the round tubes, but with a few foil sections in the mix, that becomes a bit problematic as well. The solution was to model the exact sections in Rhino, intersect them and the use the 'smash' command to unwrap the surface into a flat piece. Then you have a template that you can just print out, wrap around the tube and cut.

A few assorted pics below:


Tuesday, January 29, 2013

Deck and fairings

With the foam moulds finished for the main hull components, it was time to do the layups and pull parts off. I did the smallest part, the foredeck first to test the process using a few odd-shaped bits of carbon and some 3mm Nomex inside the curved section.  It was a bit of a half-assed job and when it came out, it was a little bit heavier than I'd hoped - just under 500g - but in the end I decided it was god enough to use. I did the deck and fairings next, one at a time as the vacuum pump was sounding a bit sick and I didn't want to loose them all at once. Meanwhile I made an effort to track down someone who sold vacuum pump oil. 

The fairings were simple to lay up except for the sail track that picks up the lower skin of the tramp. That ended up being a 9mm ID tube that I glued into the monolithic carbon part, and then reinforced a bit more on the inside and cut the groove at the end. 

The foredeck fresh out of the mould

The deck was the last thing to do, and I laid it up with 200g cloth on 6mm foam with some local reinforcing. On Andrew's (CG) advice I used a bit of 75g glass between the foam and the top skin of carbon to trap some extra resin there and ensure a solid bond, as I had some delanination there with my last deck. I carefully cut the recesses for the wingbar sockets out of the foam, not realising they were the wrong way around, an went ahead with the layup and the bag. It all sucked down very well when the vac pump finally choked and died. I think some oil leaked through the shaft seal and into the motor, and started burning on some hot part. I turned off the valve to seal the bag and just waited to see if it was all going to go to waste. Amazingly, the bag and foam mould were completely sealed, and it held a reasonable vacuum until cured. I ended up with a bit more resin in there than I hoped, but the part was usable. If I did it again I could probably save 50-100g, so a bit like the foredeck, I figure I can live with it.

I went to the cleverly named vacuum pump place 'absolute vacuum' and sorted out some new oil, took the pump apart and cleaned it out, and miraculously it now works like new. It turns out when you let it suck resin and whatever else into the rotor, it stops working. I now have a proper gauge, but am still waiting on a couple of valves and a new 'catch pot' for all the unwanted bits, and then I'll have confidence in the pump again.

the deck gallantly holding a vacuum
Laying up the carbon tube for the sail track. The mandrel was a bit of clear hose
fed over an old yacht sidestay. Because the hose getts thinner when you stretch it,
you can just pull it out.  It worked really well.
The back of the sail track, showing the bit of reinforcing on the inside.

Anyway those four major parts are now ticked off. The deck weighed in at 1.6kg with the fibreglass rods glued into the sides, the fairings / sail tracks ended up being a bit under 1.4kg for the pair. That's a bit of a weight penalty, but it's a trade off - add a bit of weight, subtract a bit of drag. It's hard to know where to go on things like that, but I'm committed to the design so im going with it. I can always cut them off again if the boat's slow. 

The last image is of the four parts post-curing on the roof. It was easily 50 degrees up there so I thought why bother with the oven!


Wednesday, January 23, 2013

Part 2 - tooling up

I was thinking of calling this port 'tooling around' because that probably best sums up what I've been doing for the last month. No-one cares about that though, instead Im going to run through the process for creating all the moulds needed for the new build.

Because I still have access to the CNC router - its now being housed by my mates at Street&Garden Furniture Co. - it was pretty straightforward to send every part, big or small, to it and create a set of female moulds. Detailed things were made in ply or MDF, and the large simple shapes were cut from 'Isoboard' EPS insulation foam, recommended by the guys at CG. I designed the boat and made the 3D model so that everything would be able to be done this way, and it was super quick to pull parts out, create the toolpath and press print. I set up a new dust extraction system to deal with the polystyrene dust, and it works really well. didn't miss a drop.

Here's a photo of the setup, and another after a weekend's of successful routing.


The bigger parts took an hour or two to cut, the smaller ones obviously were quicker. I had a couple of small issues cutting the foam where it melted etc, but that's boring so I won't go into it. Thick parts were made in layers 75mm thick, and then guled together with epoxy later. The rough-ish surface (3mm step) sanded back easily and I then sealed it with some epoxy and colloidal silica bog. Then another quick sand, another layer of thinner epoxy/silica, carefully applied with a credit card, and you're done! The moulds all held a good vacuum with no problems, important because you can't envelope bag it as it compresses the foam, and the surface quality was generally within range of 'high build'. It's gotta be the quickest way to make large composite parts.


The MDF/ply bits are now pretty straight forward. I've learnt that it's better to cut them with a much finer stepover (1.2mm or so) so that you almost don't need to sand them. It takes a bit longer on the machine, but saves you lots of stuffing around later. Then one coat of resin and a sand and they're good to go. The foil strut mould was the last thing I did, and turned out the best.